


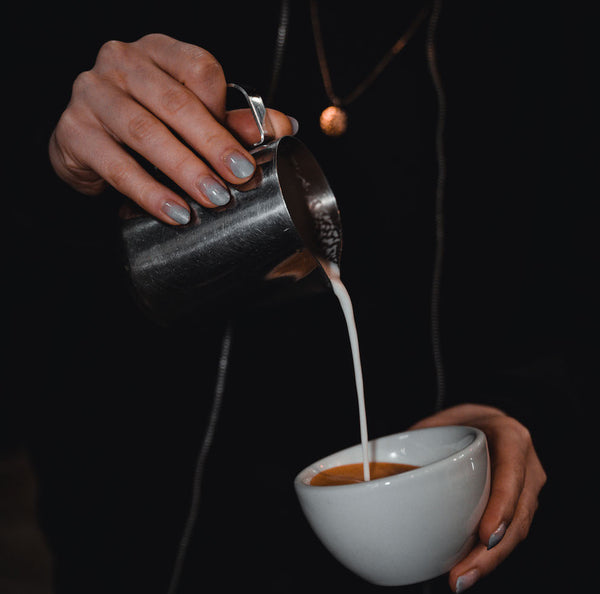
Pouring Latte Art at Home
Latte art in Melbourne is synonymous with coffee, and one part of what make the industry special. We pride ourselves in the way we present our coffee to customers, and it is one small way in which baristas are able to express their creativity.
Pouring latte art can also be seen by many as an initial measure of quality; however the techniques and skill required to pour latte art are easily learned, and practised.
We’ve compiled a list of basic steps on pouring latte art, so you’re able to begin pouring basic art at home, or even at your workplace.
Preparation
Put on your espresso shot before you start anything else. This is so you can start pouring your latte art as soon as you have finished steaming your milk. We don’t want the milk to be sitting there too long after we have finished steaming, otherwise the foam will stiffen up and can be difficult to pour with.
Last thing, turn your steam wand on for a couple of seconds to purge out any built-up water in the wand. We don’t want any additional water going into our milk.
Steam Silky Milk
To pour nice latte art, we first need to focus on steaming milk that looks glossy (we want it to look like wet paint).
Getting the milk to move in the right circular motion, adding enough air (but not too much) and heating to the right temperature (60-70°C) will all contribute towards giving you the best milk for pouring a heart, rosetta, tulip, quadruple winged phoenix, you name it. Read our milk steaming guide to learn how.
Create a blank canvas to pour onto
Start by tilting your cup at a 45° angle. This will create a deeper depth in the espresso for you to start pouring your milk into and will prevent you from breaking the crema. Begin pouring 10cm above the crema and slowly move the jug left and right without touching the sides of the cup.

We want to pour nice and gentle, so we raise the crema as opposed to breaking it. This might take a bit of practice on getting the right flow, so try practicing with water (instead of milk) to get the hang of it. Aim to get your milk stream to the same width as a straw.
Fill the cup up until it’s 60% full, and then stop pouring.
Tip: too much milk in your jug will cause the milk to pour out quicker, making it difficult to control your flow. Try to only have a little extra milk in your jug than what you need.
Let's get pouring
By keeping your cup angled, it will allow you to get the milk jug spout further into the cup and make it easier to draw your pattern.

Lower your jug towards the cup and aim to get the spout as close to the surface of the crema as possible.
Pouring a heart
Now that your spout is close to the crema, start pouring a dot 2cm in from the lip of the cup and slowly push it towards the centre of your canvas, creating a circle. As the cup is filling up with milk, slowly tilt it straighter to ensure the milk doesn’t spill out. When you’ve reached the centre, begin raising your jug up while scooping through (or cutting through) the centre of your circle.
Tip: if your heart is looking like a deflated balloon, raise your jug up higher when you cut through. This will create a thinner stream and won’t drag the shape of your heart so heavily downwards.

Pouring a tulip
If you’ve mastered how to pour a heart, let’s move onto something a little more challenging.
Pouring a tulip uses the same motion as a heart however instead of creating the dot once, we do it multiple times.
You’ll need to create a blank canvas to pour onto, just like you did with the heart (make sure to still fill the cup up 60% full).
Begin by pouring a dot 2cm in from the lip of the cup and slowly push it towards the back of the cup, holding it there for 1 second before lifting the jug up. This 1 second hold will allow for the dot to form a perfect circle and keep your pattern symmetrical.
Move back to the same spot where you started (2cm from the lip of the cup) and pour your second dot using the same slow motion. Once again, when you’ve pushed the dot far enough in, hold it there for 1 second before lifting the jug up. As you push the second dot towards the first one, you’ll notice the first dot starts to curve and make a crescent moon shape.
For the last dot, begin pouring this one 1cm in from the lip of the cup and only push it slightly into the first two before raising your jug up while cutting through the centre of all three circles.
Tip: when pouring your latte art, it’s better to move slower than too quick. If you move too quickly, the crema won’t have enough time to form around the foam and you’ll get a washed-out looking pattern or your pattern will curve to one side instead of being centred in the cup.
If you’re wanting to take your latte art to the next level, email us at training@codeblackcoffee.com.au to find out the vast range of courses we offer to help you on your coffee journey.


